Photo Booth Business Checklist: Launch in 30 Days
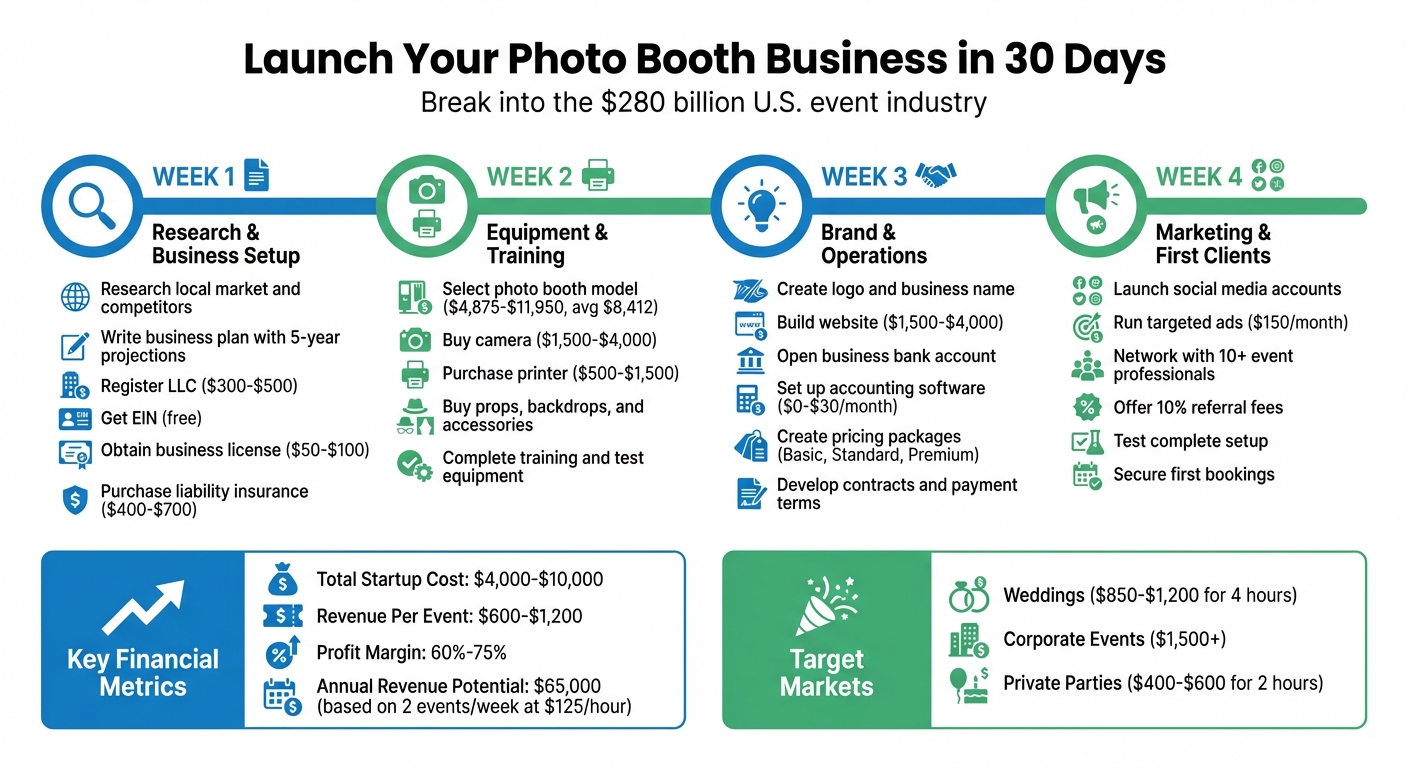
Launching a photo booth rental business is easier than you might think. With a clear plan, you can break into the $280 billion U.S. event industry in just one month. Here’s a quick breakdown of what you’ll need to do each week:
- Week 1: Research your local market, write a business plan, and register your business (LLC, EIN, licenses).
- Week 2: Buy and test your photo booth equipment, props, and accessories.
- Week 3: Build your brand (logo, website, social media) and set up financial systems (bank account, contracts, insurance).
- Week 4: Market your business, network with event professionals, and secure your first clients.
With startup costs ranging from $4,000 to $10,000, you can earn $600–$1,200 per event with profit margins of 60%–75%. Focus on weddings, corporate events, and private parties to maximize bookings. By following these tips for starting your own photo booth business, you’ll be ready to launch your business in just 30 days.
30-Day Photo Booth Business Launch Timeline with Startup Costs and Revenue Projections
Where should you begin in 2025? | How I started my Photobooth business
Week 1: Research and Business Setup
The first week is all about building a strong foundation for your photo booth business. This is the time to dive into market research, craft a solid business plan, and handle the legal steps needed to make your business official. These initial steps will prepare you for more detailed planning as you move forward.
Research Your Local Market
Start by searching for "photo booth rental [Your City]" to identify your local competitors. Explore their websites, pricing, and social media pages. Platforms like The Knot and WeddingWire can give you a better sense of the packages they offer. Also, take time to read customer reviews on Yelp and Google – these can reveal common complaints and areas where you could stand out. To spot trends, check local hashtags (like #[YourCity]Weddings) and use Google Trends to gauge interest in different booth styles.
Focus on understanding which event types are in the highest demand. Weddings, corporate events, and private parties often have different pricing expectations and needs. Look for gaps in the market – are there few providers offering 360-degree booths or advanced features like AI photo enhancements? Use this research to shape your pricing strategy and stand out in your area.
Write Your Business Plan
Keep your business plan simple and clear. Write down your goals, target market, pricing, and financial projections. Define your Unique Selling Proposition (USP) to stand out from the nearly 3,000 photo booth businesses across the U.S.
Include a five-year profit estimate and calculate your startup costs. For example, startup expenses might include photo booth equipment ($4,875–equipment ($4,875–$11,950, with an average of $8,412)1,950, with an average of $8,412), a camera ($1,500–$4,000), a printer ($500–$1,500), website and marketing efforts ($1,500–$4,000), and insurance ($400–$700). If you run two five-hour events per week at $125 per hour, you could bring in around $65,000 annually. Set SMART goals – Specific, Measurable, Attainable, Realistic, and Timely – and create an operations plan covering everything from event setup to handling equipment issues.
Register Your Business and Get Licenses
Decide on a business structure, such as forming an LLC, which helps protect your personal assets. LLC filing fees typically range from $300 to $500, depending on your state.
Apply for an Employer Identification Number (EIN) through the IRS – it’s free and necessary for tax purposes and opening a business bank account. Starting in 2024, you’ll also need to file a Beneficial Ownership Information (BOI) report with FinCEN. On a local level, secure a general business license (typically $50–$100 annually) and, if you plan to sell physical prints, a seller’s permit from your state’s Department of Revenue.
Don’t forget to purchase general liability insurance with at least $1 million in coverage. Many venues require a Certificate of Insurance (COI) before allowing you to operate on-site. Annual premiums for this type of insurance usually run between $400 and $700.
Week 2: Buy and Set Up Your Photo Booth Equipment
Now that you’ve laid the groundwork for your business, it’s time to invest in the equipment that will help you generate income. This week is all about choosing the right photo booth, gathering the necessary accessories, and getting comfortable with how everything works.
Select Your Photo Booth Model
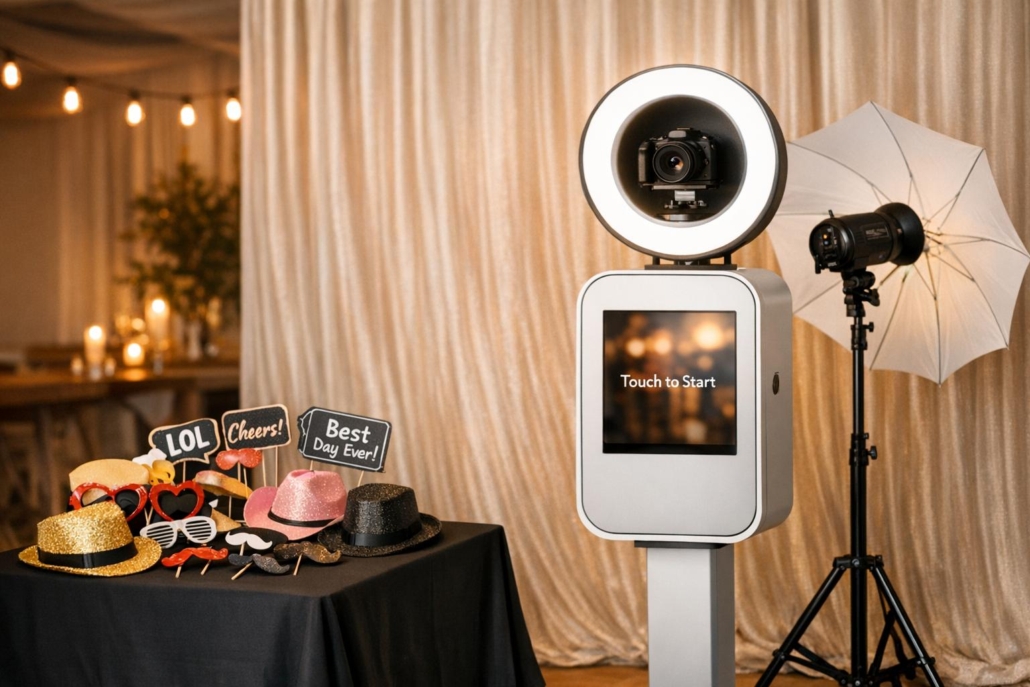
The photo booth you choose should align with both your budget and the needs of your target audience. DSLR booths, for instance, deliver high-quality photos and professional lighting, but they take longer to set up (30–45 minutes). On the other hand, iPad-based booths are quick to set up and perfect for social media sharing.
"Choosing the best photo booth for your business hinges on two important considerations: how much money you’ve got to spend, and the wants, needs, and expectations of your target market." – Andrew Strother, Photo Booth Supply Co
Some popular options from Photo Booth International include the Cloee Ring Light ($5,250) for DSLR-quality images, the Mirror 4 ($8,999) for upscale events, and more affordable iPad-based booths priced between $1,850 and $3,500.
When buying, make sure your booth comes with lifetime tech support and all the necessary components. Some manufacturers only provide the "shell", meaning you’d have to purchase the camera and computer separately. Test the setup process beforehand to ensure it’s manageable, and use an ROI calculator to estimate how many events you’ll need to book to cover your investment.
Once you’ve picked your booth, it’s time to stock up on accessories.
Buy Accessories and Props
Accessories are key to delivering a fun, polished experience. Start with the basics: a sequin backdrop, playful props, a dye-sublimation printer (around $900), professional lighting, sturdy travel cases, and sandbags to stabilize your setup.
To stand out, consider offering digital overlays or custom branding for weddings and corporate events. You could also create tiered packages with different backdrops or themed prop sets to boost your booking value.
With your gear ready, take advantage of available resources to master your equipment.
Use Photo Booth International‘s Support Resources
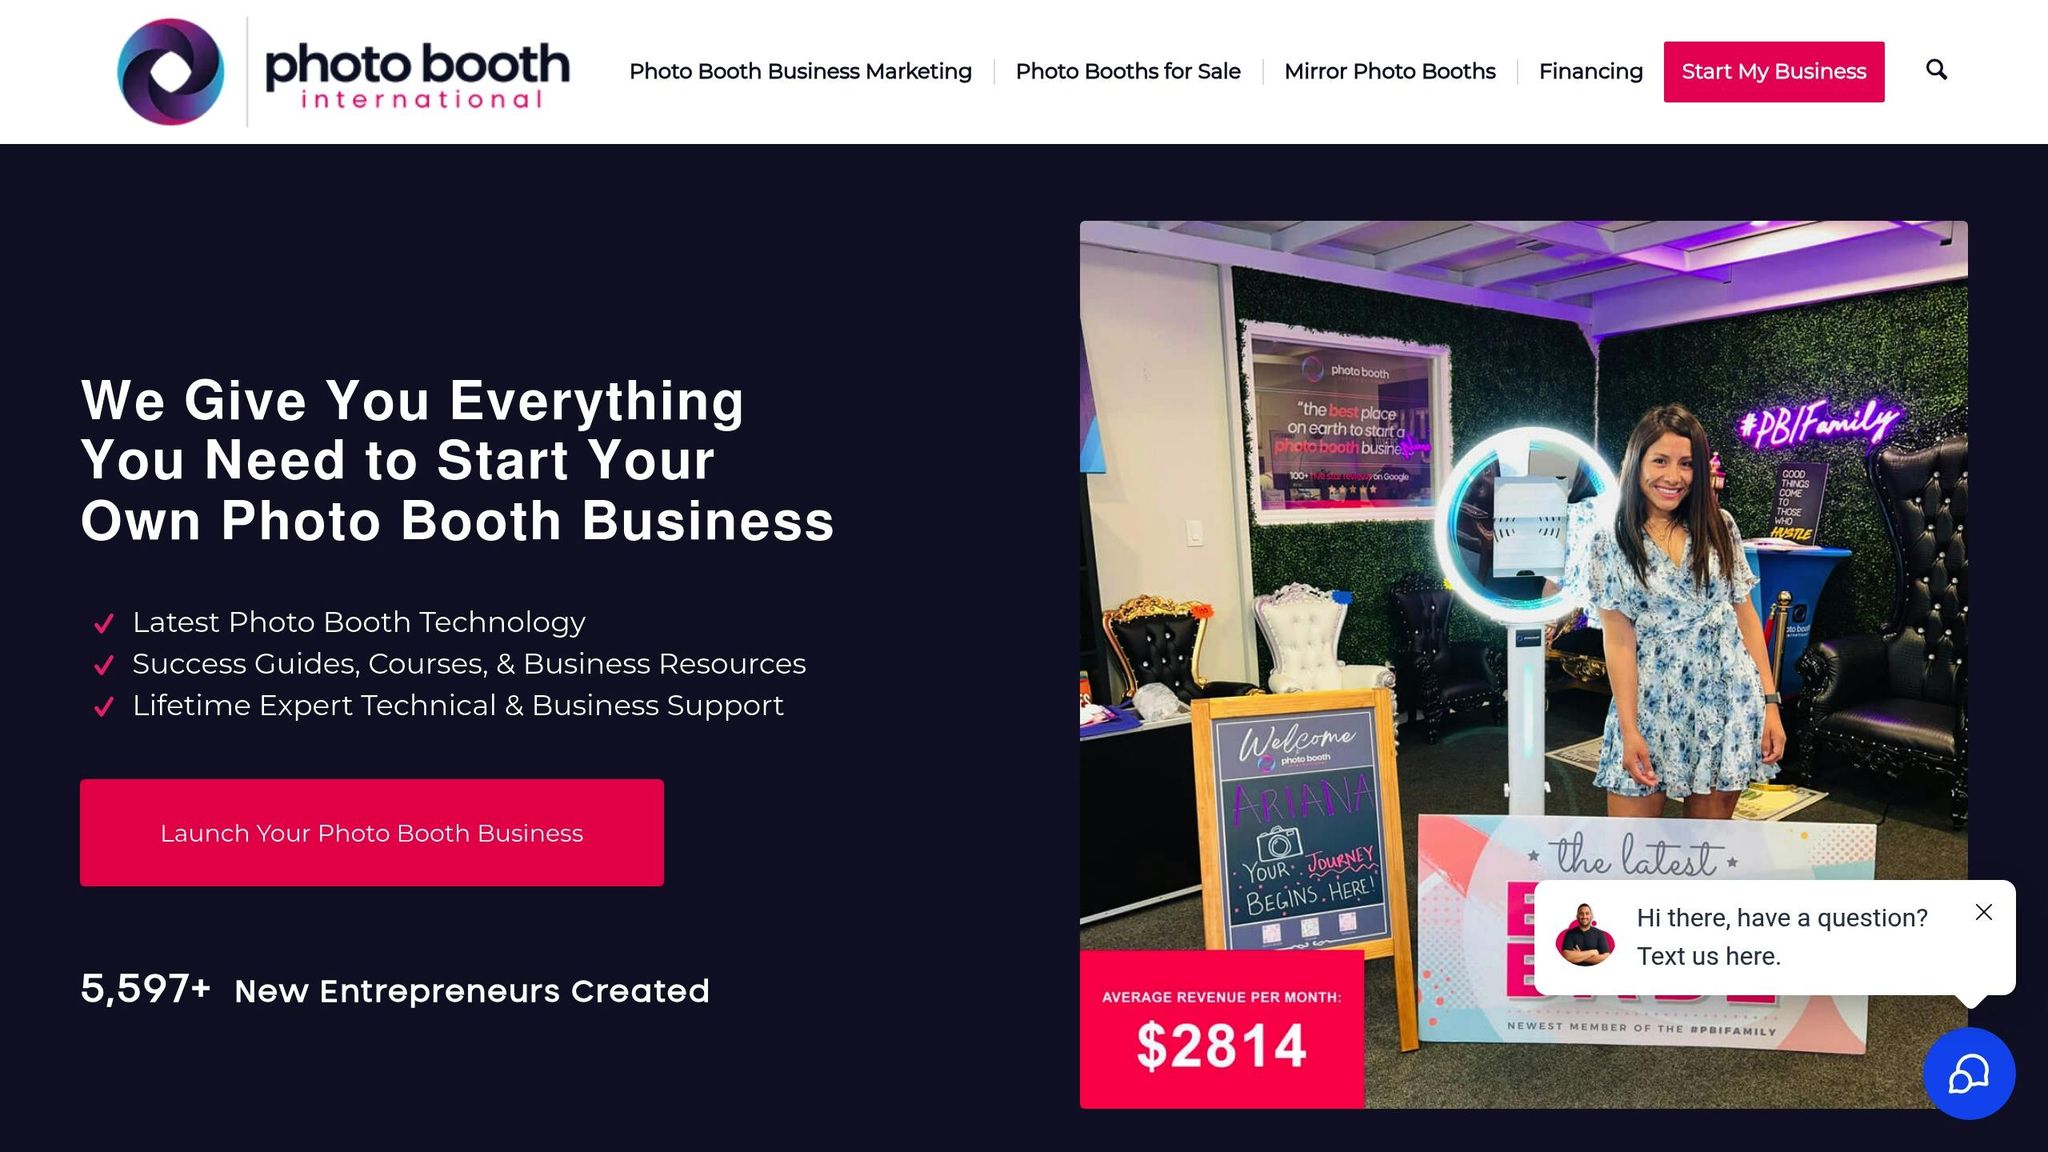
Photo Booth International provides tools and support to help you hit the ground running. After your purchase, you’ll have access to lifetime tech support and the PBI App, which features expert-led courses covering setup, software, and troubleshooting.
Join the #PBIFAMILY Facebook group to connect with seasoned photo booth owners who can share tips on navigating your local market and solving technical issues. For immediate help, you can call their dedicated support line at 972-301-2930. If you’re looking to dive deeper, schedule a one-on-one training session to sharpen your skills faster.
Many users have successfully recouped their investment early by relying on these resources.
"Even after the purchase they still keep in touch to help get your business established." – Stacey Whitley, Verified Buyer
This week, focus on assembling all your equipment, testing every cable and piece of software, and completing the training materials. By next week, you’ll be ready to shift your attention to building your brand and marketing your services effectively.
sbb-itb-388abf8
Week 3: Create Your Brand and Set Up Operations
Now that your equipment is ready, (or if you’re still deciding, check out these tips for buying your first photo booth) it’s time to focus on building a professional identity and setting up the systems that will keep your business running smoothly. This week is all about crafting a brand that draws in clients and establishing the financial and operational foundation you’ll need from the start.
Develop Your Brand
Your brand is the first impression clients will have of your business, so it’s important to make it count. Start by picking a business name that’s distinctive and easy to remember. Make sure the domain is available so you can secure your online presence. If you plan to expand your services beyond photo booths in the future, avoid including "photo booth" in the name to keep your options open and improve search visibility.
Next, create a professional logo and build a website using platforms like Squarespace or Wix. Your website should highlight your best work, clearly outline pricing packages, and offer an easy booking option. If you’re short on time or skills, Photo Booth International offers custom website services to help you get started quickly. A well-designed website can convert approximately 9% to 10% of its visitors into paying clients, and the top organic search result on Google captures 31.7% of search traffic.
Avoid using low-quality, blurry photos in your portfolio – they can harm your brand image. If you don’t have client photos yet, organize a “styled shoot” with friends or family to create a polished gallery. Additionally, print professional business cards to hand out at networking events and ensure your branding is consistent across all platforms, both online and offline.
Once your brand is in place, shift your focus to organizing your operations.
Set Up Financial and Legal Systems
With your brand established, it’s crucial to secure your business’s operational foundation. Start by opening a dedicated business bank account and obtaining a free EIN (Employer Identification Number) from the IRS. The process is quick and keeps your finances organized, making tax season far less stressful.
Invest in accounting software like QuickBooks, Xero, or Wave, which can cost between $0 and $30 per month for small businesses. These tools connect to your bank account, automatically track income and expenses, and categorize transactions using AI – saving you time and effort.
To streamline client management, consider using software like HoneyBook, Dubsado, or Check Cherry. These platforms allow you to send digital contracts and invoices easily. Photo Booth International also provides pre-written, customizable contracts to simplify this process. Establish a standard payment structure, such as requiring a 50% non-refundable deposit to secure bookings, with the balance due 7 to 14 days before the event. Lastly, make sure you’re covered with general liability insurance. Most venues require a Certificate of Insurance, so aim for coverage of at least $1 million.
Create Your Pricing Packages
When setting your prices, start by calculating your direct costs, such as paying attendants ($20–$35 per hour), travel expenses, and supplies like ink and paper. After covering these costs, aim for a profit margin of 60% to 75% per event.
Establish a baseline rate of $100 per hour and create three package tiers: Basic, Standard, and Premium. For private parties, typical packages range from $400 to $600 for two hours. Weddings generally cost between $850 and $1,200 for four hours, while corporate events often exceed $1,500 due to the added value of custom branding and data capture.
Increase your earnings with high-margin add-ons, such as guest books ($100), custom backdrops ($200), or extra service hours ($175). Be sure to include essentials like an attendant, props, and unlimited prints in your standard packages to meet client expectations. Before finalizing your pricing, research local competitors on platforms like The Knot and WeddingWire to identify photo booth business opportunities to stand out in your market.
Week 4: Market Your Business and Get Your First Clients
You’ve built your brand, organized your operations, and nailed down your pricing. Now it’s time to put your business out there, attract clients, and secure those first bookings. This week is all about kicking off your marketing strategies, connecting with event professionals, and making sure your equipment is ready to perform when it matters most.
Start Your Marketing Campaign
Set up business accounts on Instagram and Facebook – these platforms are where your potential clients are likely hanging out. Post eye-catching photos and videos that highlight your booth in action. To make things easier, Photo Booth International provides ad templates, SEO tools, and email campaigns to help you hit the ground running.
Budget around $150 per month for targeted social media ads. Focus on reaching newly engaged couples within a 25-mile radius of your city. At events, encourage guests to tag your business when they share their photo booth pictures. This type of user-generated content is like free advertising and helps build trust with potential clients.
Don’t forget the power of old-school marketing. Print professional business cards and keep them handy. Visit local wedding-related shops, like florists and bakeries, and ask if you can leave your cards or brochures in their stores.
Connect with Event Professionals
Once your online presence is solid, start building local connections. Networking is one of the quickest ways to lock in bookings. Make a list of at least 10 local venues, wedding planners, and event coordinators to contact during your first month. Reach out personally – introduce yourself, share your portfolio, and offer a 10% referral fee for every client they send your way.
Expand your network by partnering with complementary vendors, like DJs, caterers, and photographers. These professionals often recommend services to their clients, and your photo booth could be an easy addition. Aim to become a "preferred provider" at hotels and venues, which can lead to steady bookings. Keep in mind that many venues require a Certificate of Insurance with at least $1 million in coverage before you can operate.
Remember, weddings aren’t your only market. Corporate events, school proms, bar and bat mitzvahs, and quinceañeras are all great opportunities for photo booth services. With an estimated 18 million events happening annually in the U.S. and $280 billion in event spending, there’s plenty of demand to tap into.
As your network grows, make sure your setup is flawless before your first big event.
Test Your Setup
Before diving into paid events, ensure your equipment is in perfect working order. Test your system thoroughly to avoid any hiccups on-site. Confirm that your camera and software are fully compatible. Practice setting up and breaking down your booth several times to get familiar with the process and spot any potential issues.
Take 20–30 test photos to check focus, lighting, and color accuracy. Run test prints to catch any problems, like streaks or paper jams, before the event. If you’re offering instant social media sharing, test your Wi-Fi hotspot or data card to ensure a reliable connection.
"You will have to troubleshoot and understand the inner workings of your photo booth before doing an event."
– photoboothtraining.com
It’s also a good idea to host a few free events for friends or family. This gives you a chance to work out any technical issues and gain confidence. Photo Booth International offers training resources to help you handle common troubleshooting scenarios, so you’ll feel prepared for anything. Additionally, have a backup attendant trained and ready to step in if needed. This way, you can guarantee a smooth and professional experience every time.
Conclusion
Launching a photo booth business in just 30 days is no small feat, but with the right plan, it’s absolutely achievable. By following a clear roadmap – covering everything from market research and LLC registration to choosing the right equipment and securing your first bookings – you can position yourself for a strong start in an industry that still has room for new entrants.
The formula for success boils down to three essentials: thorough preparation, smart marketing, and using the right tools and resources. With an initial investment ranging from $4,000 to $10,000, you can earn between $600 and $1,200 per event, enjoying profit margins as high as 60%–75%. Partnering with experts and utilizing proven strategies can give you a head start in a competitive market.
To keep your momentum, focus on building strong connections with event professionals, delivering top-notch service, and expanding your reach beyond weddings to corporate events and private parties. Once you establish credibility, your calendar can fill up quickly, thanks to the high demand for events throughout the year. Testing your equipment thoroughly, exceeding client expectations, and engaging with customers on social media can help drive organic growth and referrals.
While the first month is critical for laying the groundwork, long-term success depends on continuous improvement and customer engagement. Invest in quality equipment, consistently refine your processes, and price your services competitively to reflect their value. With determination and steady execution, you can create a thriving business that not only generates reliable income but also becomes a trusted part of your community.
FAQs
What steps do I need to take to legally start a photo booth business in the U.S.?
To legally start your photo booth business in the U.S., here’s what you need to do:
- Pick a business structure: Many photo booth owners choose an LLC because it helps protect personal assets and keeps things simple to manage. Before moving forward, check your state’s business registry to confirm your chosen business name is available and not already trademarked.
- Register your business: File the required paperwork with your state, such as the Articles of Organization if you’re forming an LLC. Filing fees usually range between $50 and $300. You’ll also need a registered agent and, in some states, an Operating Agreement.
- Apply for tax IDs: Get a free Employer Identification Number (EIN) from the IRS. This is necessary for handling taxes and setting up a business bank account. Don’t forget to register with your state for any applicable taxes, like sales tax.
- Get permits and insurance: Depending on where you operate, you may need specific licenses or permits, especially if you’re running the business out of your home or setting up at events. Protect your business with general liability insurance and coverage for your equipment.
- Set up banking and accounting: Open a business bank account using your EIN and other business documents. Keeping your finances in order is crucial, so use accounting software to track income and expenses right from the start.
By tackling these steps, you’ll have your business legally set up, financially organized, and ready to hit the ground running – often within 30 days!
What are the best ways to market my photo booth business and attract clients quickly?
To get your photo booth business off the ground and attract clients quickly, zero in on specific event types like weddings, corporate gatherings, and private parties. Start by building a clean, mobile-friendly website that highlights your booth in action with high-quality photos, transparent pricing (e.g., Standard Package – $750 per event), and a simple way for potential clients to reach you. Make sure your site is optimized for local SEO – list your business on Google Business Profile, use targeted keywords like photo booth rental [Your City], and encourage happy clients to leave glowing reviews.
Social media is your next best friend. Platforms like Instagram and TikTok are perfect for sharing fun, bite-sized videos of guests enjoying your booth. Use popular location-based hashtags (e.g., #ChicagoWeddings) to expand your reach. To give your visibility a boost, consider running a limited-time deal like Book within 7 days and get a free photo strip upgrade. Pair this with a small ad budget to target event planners in your area (within a 25-mile radius) on Facebook/Meta.
Don’t underestimate the power of networking. Build relationships with local wedding planners, venue managers, and event organizers. Attend bridal expos, school fairs, or community events to showcase your booth in person – it’s a great way to make a lasting impression.
Lastly, encourage word-of-mouth marketing by offering referral discounts. For example, give a discount on a future booking for clients who refer new customers. Combine these strategies with consistent outreach and eye-catching marketing materials, and you’ll be well on your way to securing bookings and growing your photo booth business.
What types of events are most profitable for a photo booth rental business?
The most profitable events for a photo booth rental business often revolve around weddings and corporate events. Weddings, with their typically larger budgets, often demand multiple setups – think classic photo strips, GIF booths, or even 360-video booths – allowing you to offer a range of options that can significantly boost your earnings. On the corporate side, events like product launches, conferences, and brand activations are equally rewarding. Companies are often willing to pay a premium for features like custom branding and digital sharing tools, which not only entertain but also serve as effective marketing tools.
Other income-generating opportunities include private parties (such as birthdays, anniversaries, or milestone celebrations), school events like proms and homecomings, and large public gatherings such as festivals, nightclub events, or shopping mall promotions. These types of events can ensure steady demand or attract high foot traffic, making them ideal for consistent revenue and repeat bookings. However, weddings and corporate events remain the cornerstone for maximizing profits and building a loyal client base.

